 |
 |
 |
 |
 |
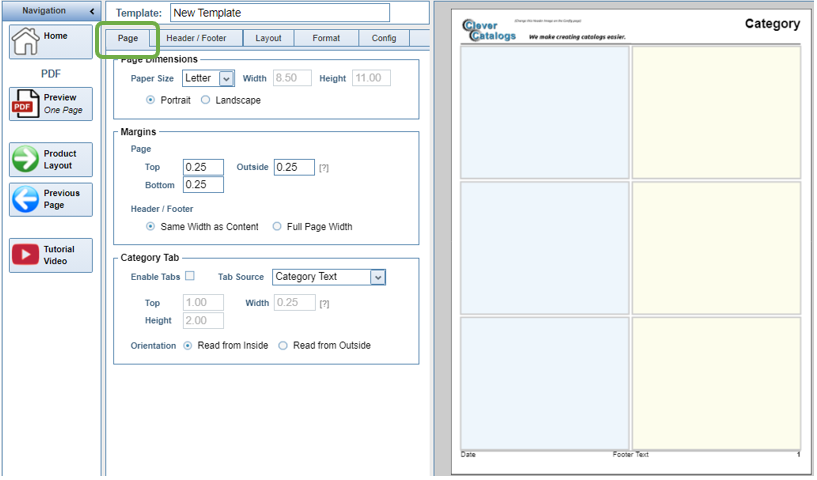
Page Setup
|
Page Setup is used to define the general look of the page: Dimensions, Orientation, Headers and Footers, and the number of Product Layouts. These settings are arranged in Tabs near the top of the form. |
NOTE: The Preview button on any of the Template Editor pages will create only a one-page+one-product PDF. If you want to see an entire category, open a preview from the Home page.
|
|
The Design Pad on the right side of the page shows the number and shape of the Product Layouts. |
Page
|
|
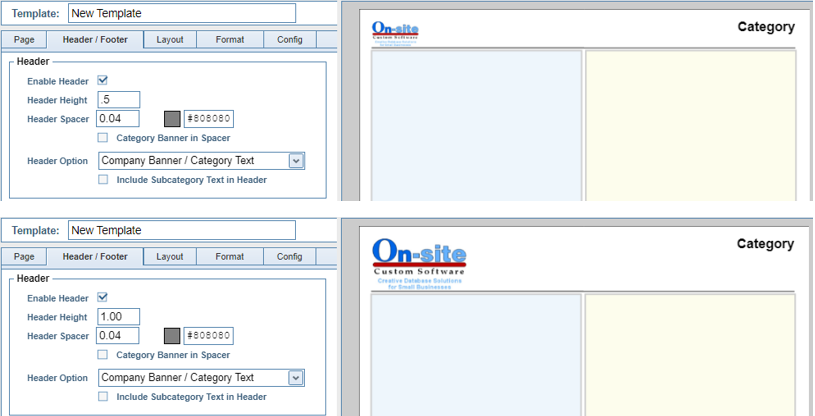
Header
|
There are many options for the Page Header and the best design approach is usually to experiment with them and see how they look. The size of any image in the Header is controlled by the Header Height setting. In the first example below, the logo is quite small because the Header is only 1/2" tall. When the Header is increased to 1" in the second example, the logo image automatically grows to fit the available space. |
|
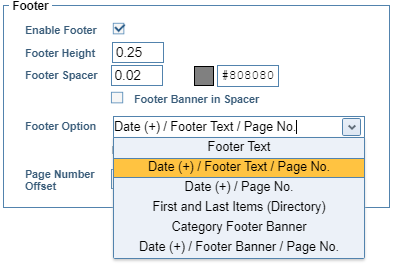
Footer
|
|
Product Layout
|
There are two types of Layouts. With a Static Layout, you set the number of Columns and Rows to be printed in a Grid. |

|
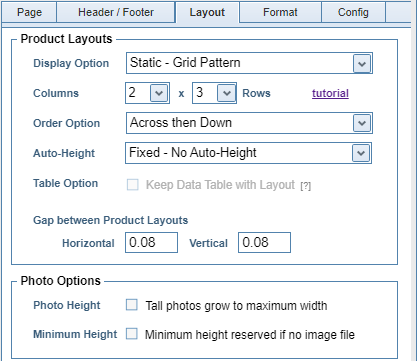
|
|
With a Dynamic Layout, you set only the number of Columns because each Product Layout grows to fit the text. As a result, the number of products on a page varies and the tops of the layouts do not align to a Grid. |
|
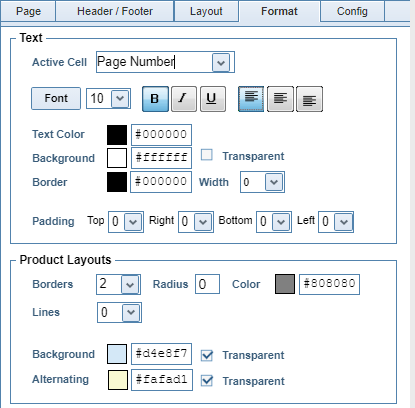
Format
|
Use the Active Cell Selector to choose any text element, or click to select it on the Design Pad. Then use the various formatting controls to change the appearance of that text. |
|
|
Config
|
Lastly, if you imported your Product Data from Wix with the Subcategory option, the Config Tab allows you to set where that text appears in a Dynamic Template. Typically, Subcategory text prints as a Column Break whenever the subcategory changes. However, some users may prefer to have it appear at the top of every column, even if it hasn't changed from the previous column. |
Return to Tutorial Selection or View the Product Layout Tutorial