 |
 |
 |
 |
 |
Importing Data from a Spreadsheet
|
The fastest way for most users to bring their data into CleverCat is by importing it directly from a spreadsheet. |
Preparing Your Data
|
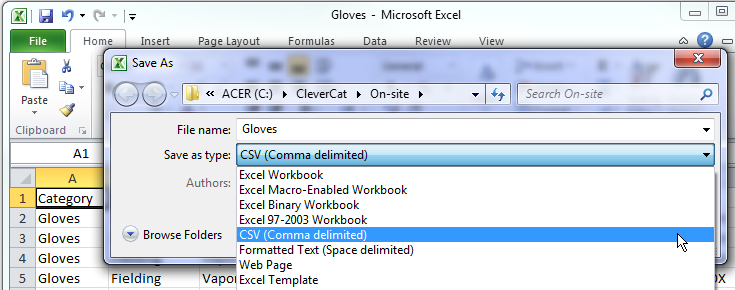
The spreadsheet must be saved as a CSV file. This can be done in Excel by choosing File --> Save As, and then selecting CSV from the Save as type: drop down menu. |
|
|
|
Step 1: Upload a File
|
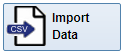
The procedure for importing data from a spreadsheet is broken into four steps. The first is to upload your CSV file to CleverCat's server for processing. Drag and Drop your CSV file into the area indicated next to the list of filenames, or just click the Blue and White Arrow icon to browse your local drive and select a file. |

|
Step 2: Select and Import a File
|
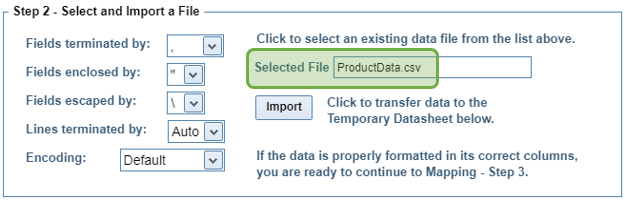
Click any file uploaded under Step 1, to place the name into the Selected File box under Step 2, and click the Import button. |
|
|
Most users will not have to change the Fields options under step 2. This is only necessary when your file contains unusual characters or non-standard formatting. Contact Us if you need free assistance with this step. Click the Import button to process the uploaded file. This process will take approximately 10 seconds for every 1,000 rows in your spreadsheet. When completed, your products should appear in the Temporary Datasheet section at the bottom of the page. If your data does not appear in the Temporary Datasheet, or is improperly formatted, you can experiment with the Fields options and click the Import button again, or email us for no-charge support. |
|
NOTE: The Temporary Datasheet is not connected to your saved product data. You can safely repeat Step 2 with different CSV files or Field Options without affecting anything. Also, if you leave the Import Data form after completing Step 2, you can re-open the form and the Temporary Database will be automatically reloaded with the data from the last time Step 2 was performed, allowing you to continue with Step 3 on the Mapping tab. |
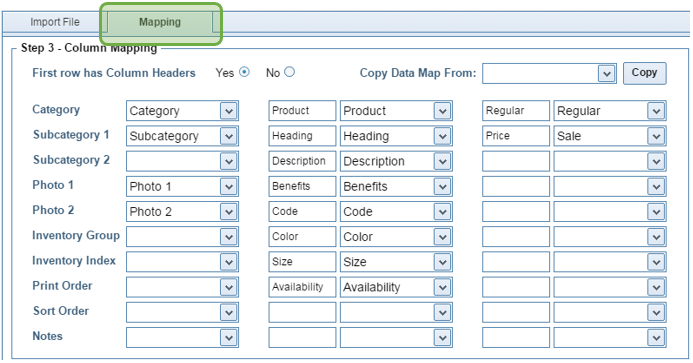
Step 3: Column Mapping
|
Under Step 3, select the columns from the spreadsheet (Temporary Datasheet) that you want imported into the Product Database, using the Drop-down Selectors. As you select columns, the Label box to the left of the Selector is automatically filled in with the column name. |
|
|
NOTE: You do not need every selection. Category is the only required selection. |
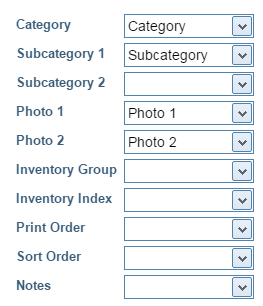
Predefined Fields
|
The leftmost stack of columns contains pre-defined Field Selections, such as Category and Photo 1, which are used in the organization of data. In this stack, most users will only these two fields. Leave the unnecessary Field Selections blank. |
|
|
|
Print Order and Sort Order numbers are used to create the Data Tables. If an Inventory Group
selection is made, these numbers will be created automatically. If your data is already sorted and grouped
in your spreadsheet, these numbers can be imported instead. |
|
Notes is actually a Data Field, just like the 20 Custom Data Field selections on this form. |
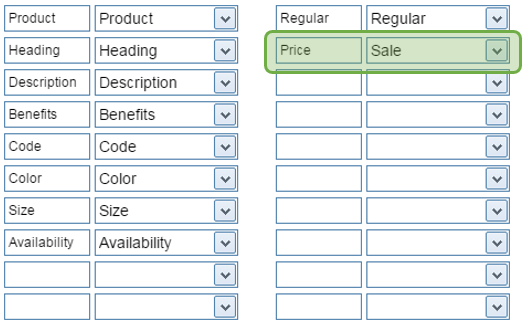
Custom Data Fields
|
The other two stacks of columns consist of Custom Data Fields. Each Data Field also has a Label--which does not have to match the name of the column. In this example, the name of the last column selected is Sale but the Label is Price. |
|
|
|

|
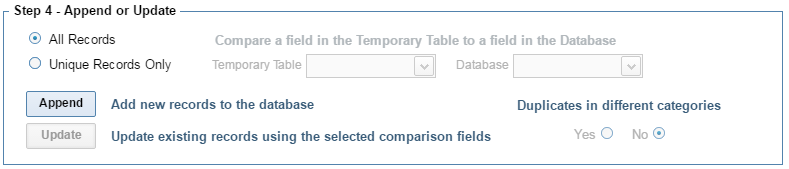
Step 4: Append
|
if this is the first time you are importing data, select the All Records option and then click Append to upload from the Temporary Datasheet to your saved Product Datase. Categories will be created automatically. It may take a minute or two to copy all the records and then, if successful, a pop-up box will show how many records have been copied. |
|
|
IMPORTANT: Do not click the Append button a second time. This will result in duplicate records. If you already have data saved in your Product Database, we strongly recommend that you make a copy of the Database or a Backup before using the Append or Update functions. |
Return to Tutorial Selection or continue to Upating from a CSV File.